How to install Procreate Brushes
Here you’ll find instruction on how to download and install Procreate Brushes and Color Palettes. Tap on 1-4 here below to go directly to the instructions you wish to read.
Procreate brushes are easy to install. You can install whole brush sets and single brushes. Most of our brushes comes in brush set files, which means that you’ll get all of the brushes in a folder in the brush library on Procreate. Follow the instruction below to install.
Install from file (Zip-file)
Start with downloading the file to your iPad or send the file to your iPad through a cloud service or e-mail yourself. The following instructions work for both brush sets and single brushes.
Step 1
Tap the link in the email with your digital downloads
Step 2
The download will open in your browser, tap Download.
Step 3
Tap the downloads symbol in your browser and tap the file.
Step 4
Your Files folder will open and in the Downloads folder you’ll see a Zip-file. Tap the Zip-file to un-Zip.
Step 5
Tap the un-zipped folder to access the files inside.
Step 6
Depending on your download you’ll get different files. To import brush set files and swatch files in Procreate, tap the files.
Step 7
Your brush set or color palette is imported in Procreate and ready to be used.
2. How to find your downloads folder on your iPad
Step 1
Search for the folder Files in your iPad search window.
Step 2
Tap the Downloads folder to access the files.
3. Install from file (unzipped-file)
Start with downloading the file to your iPad or send the file to your iPad through a cloud service or e-mail yourself. The following instructions work for both brush sets and single brushes.
Step 1
All you need to do is to click on the file and then click on the OPEN IN PROCREATE alternative, shown on the image below.
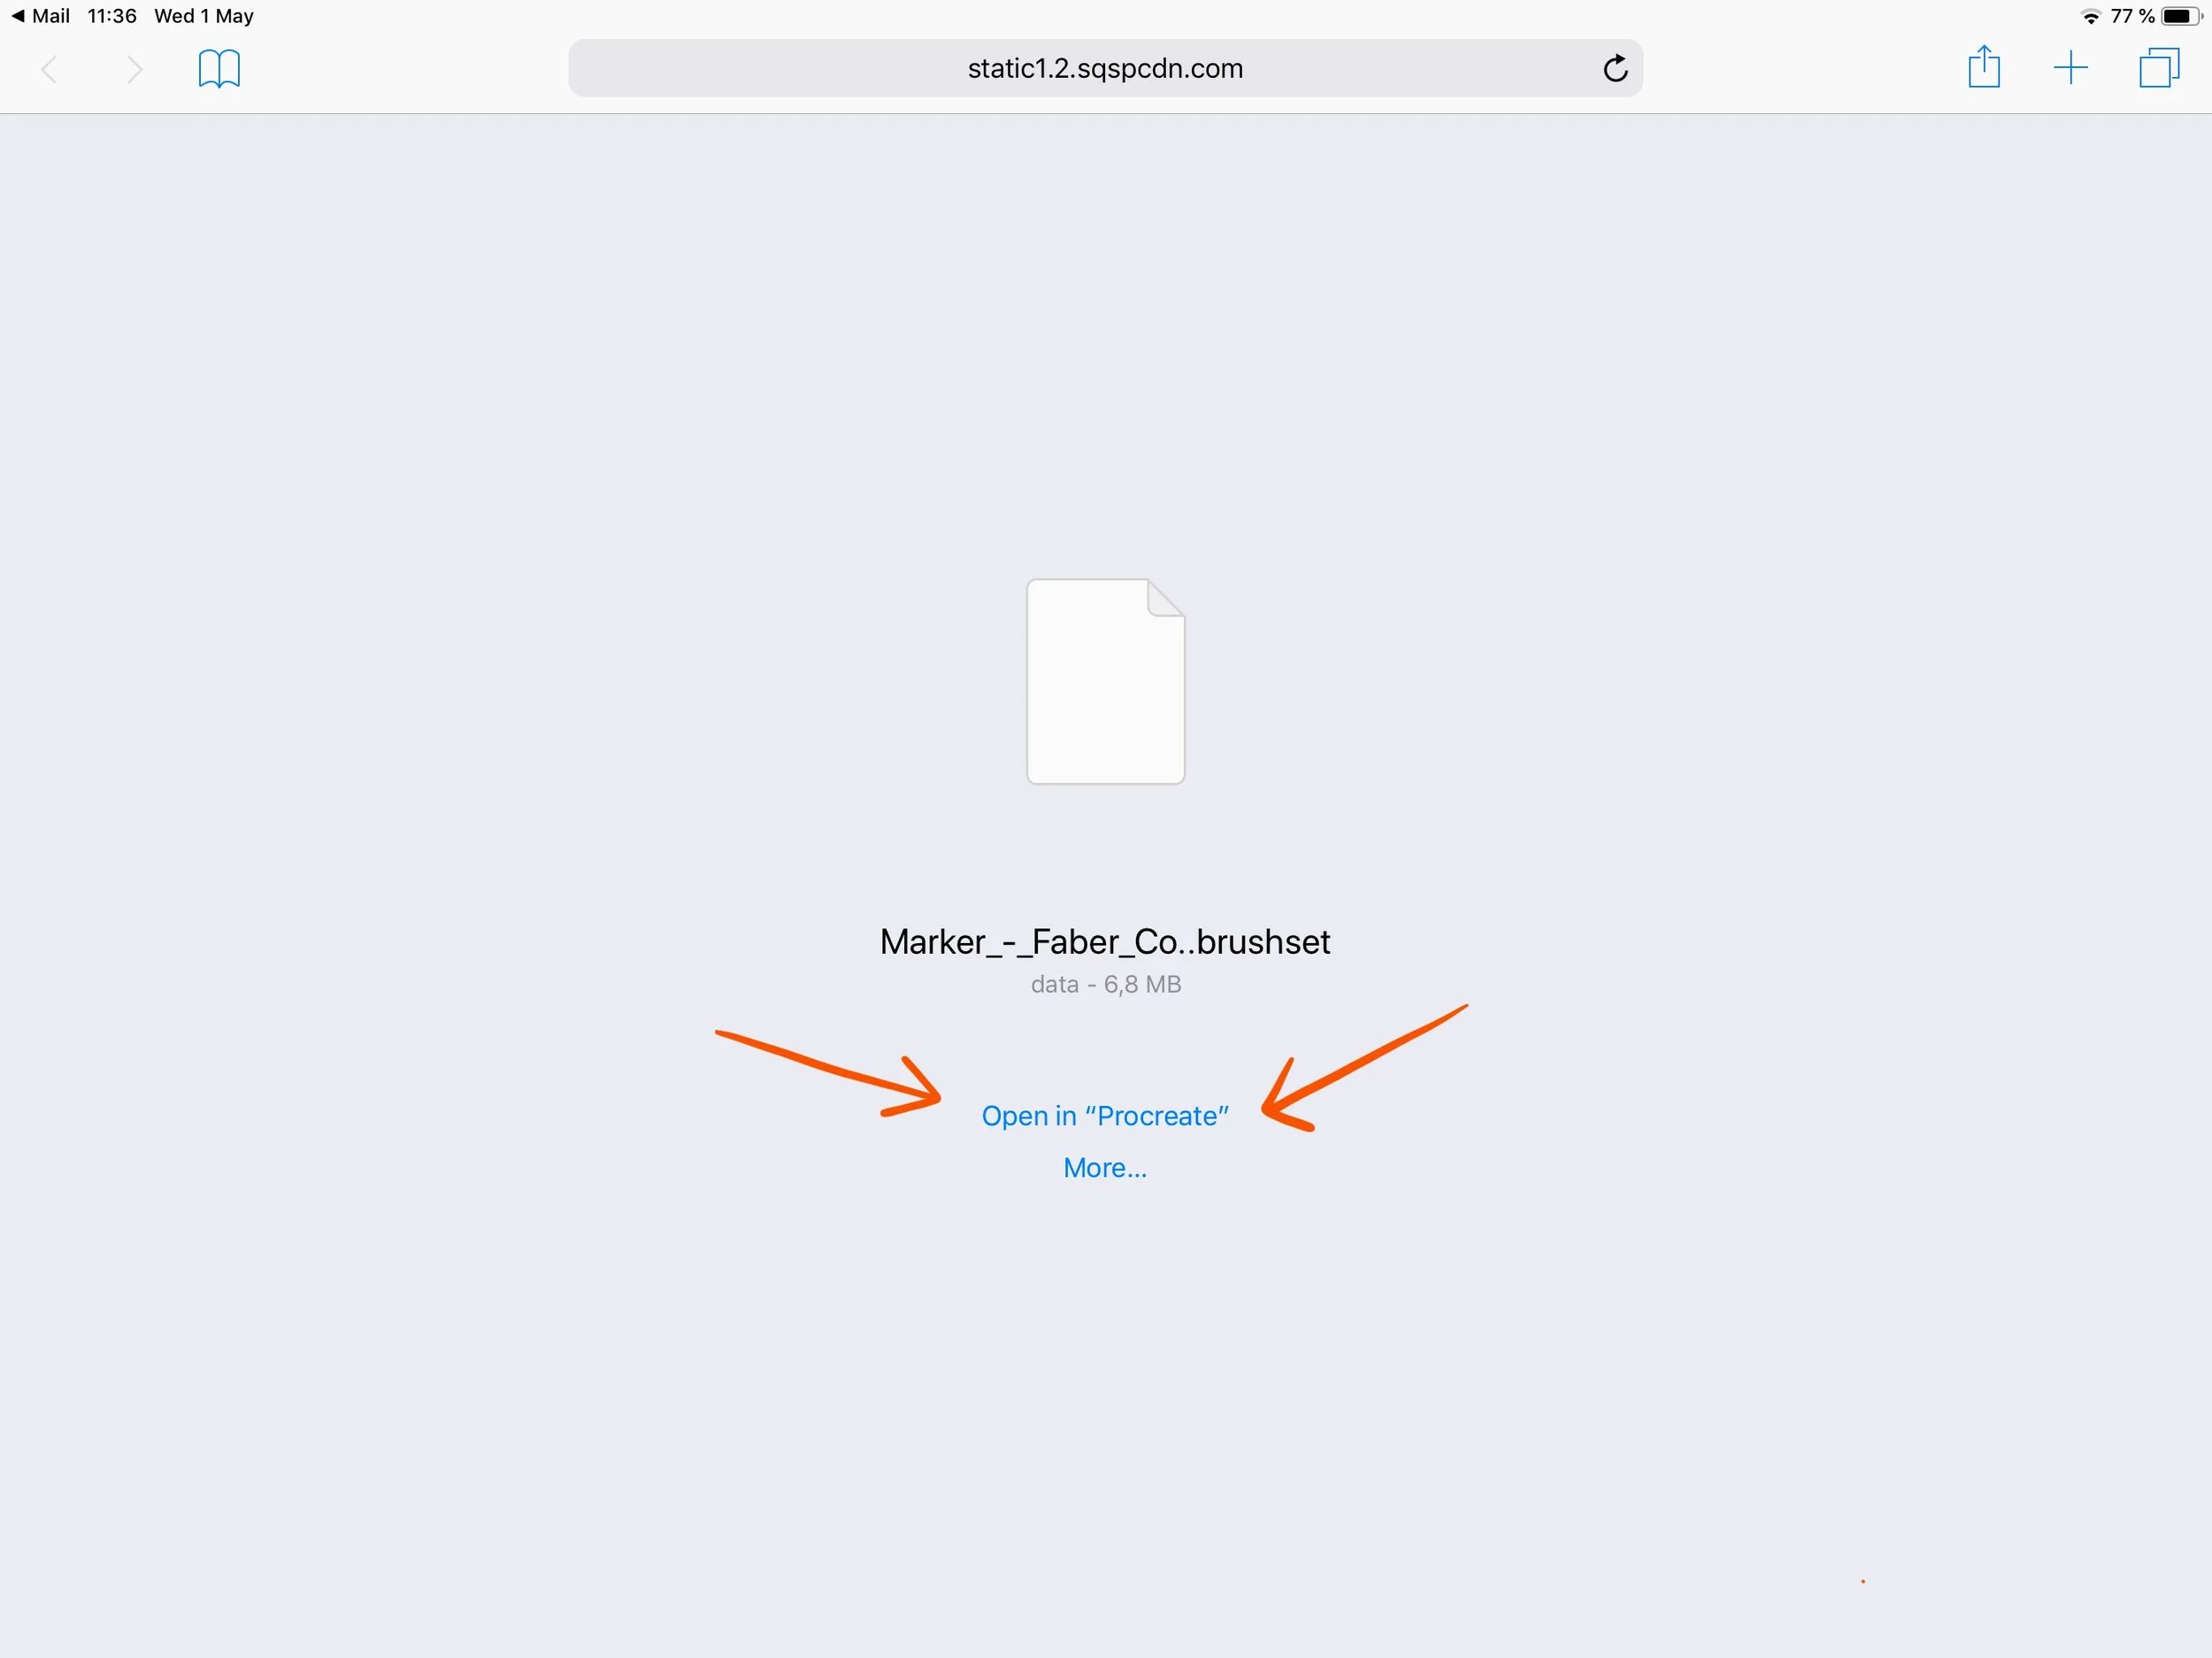
Step 2
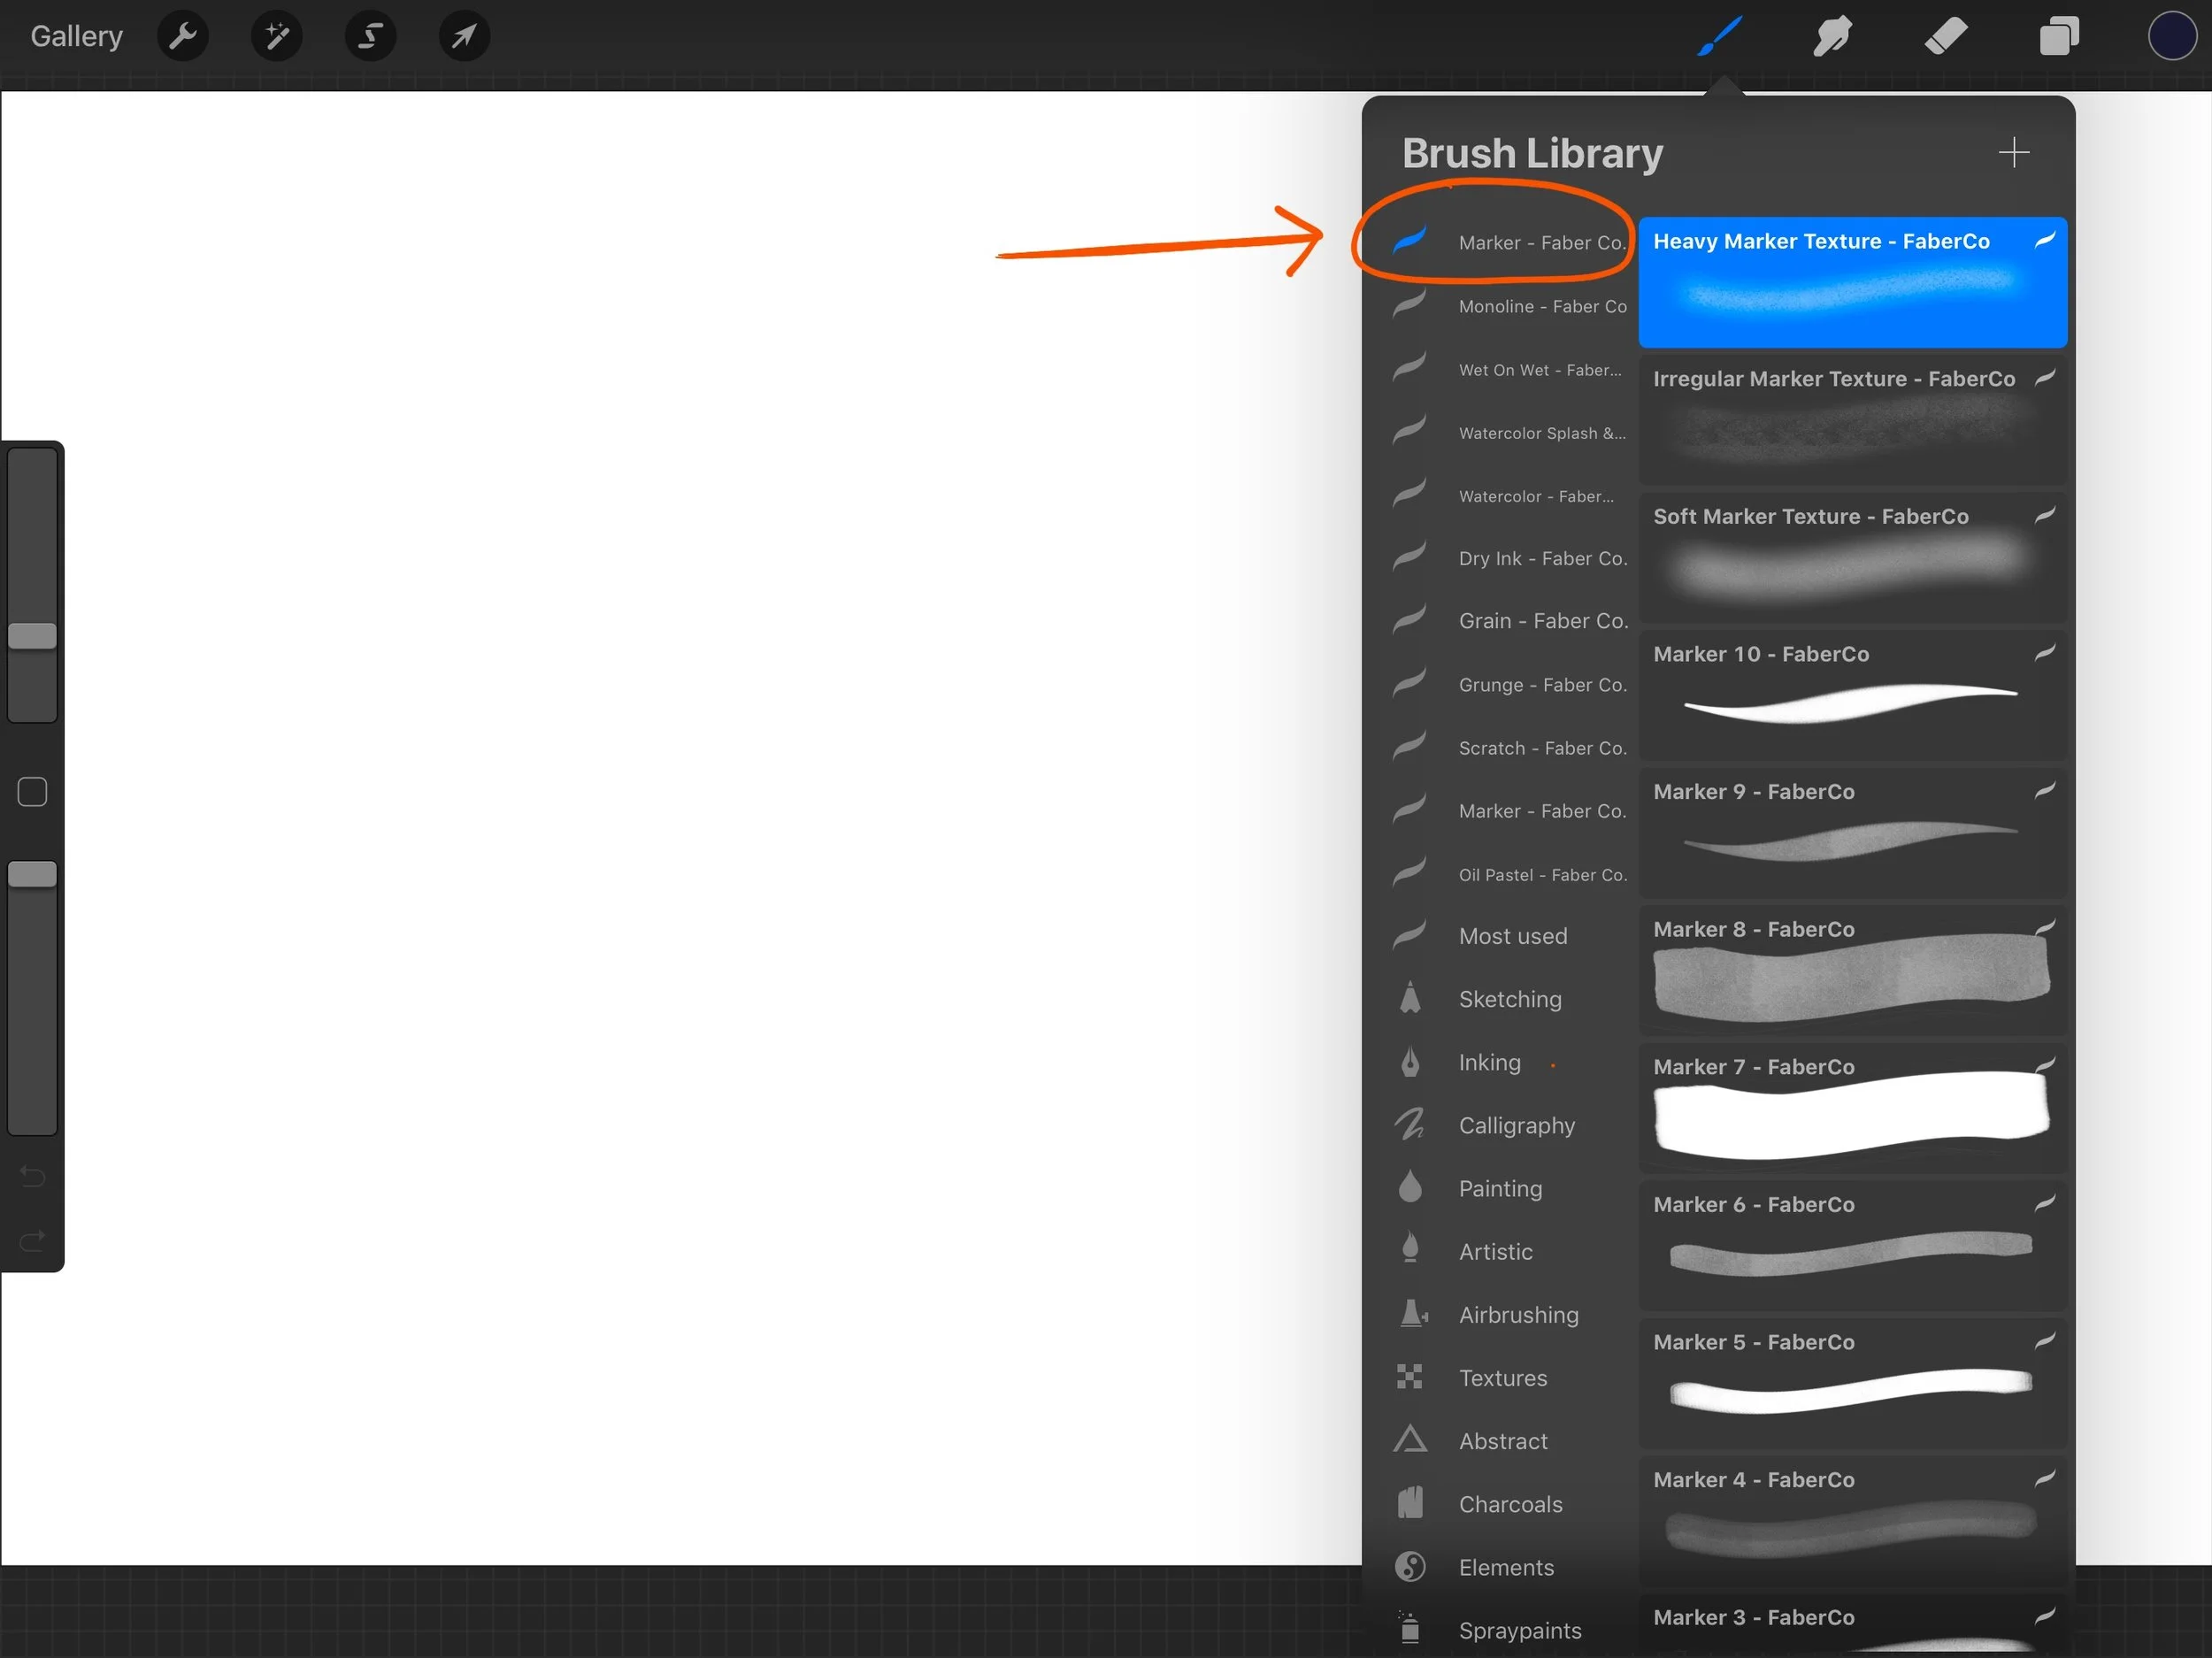
This opens Procreate and adds the brush set to your brush library.
Note that if you’ve downloaded a single brush you’ll find it in the folder IMPORTED.
4. Install from inside of Procreate
Use the following instructions when you want to install single brushes when you’re already in the Procreate app.
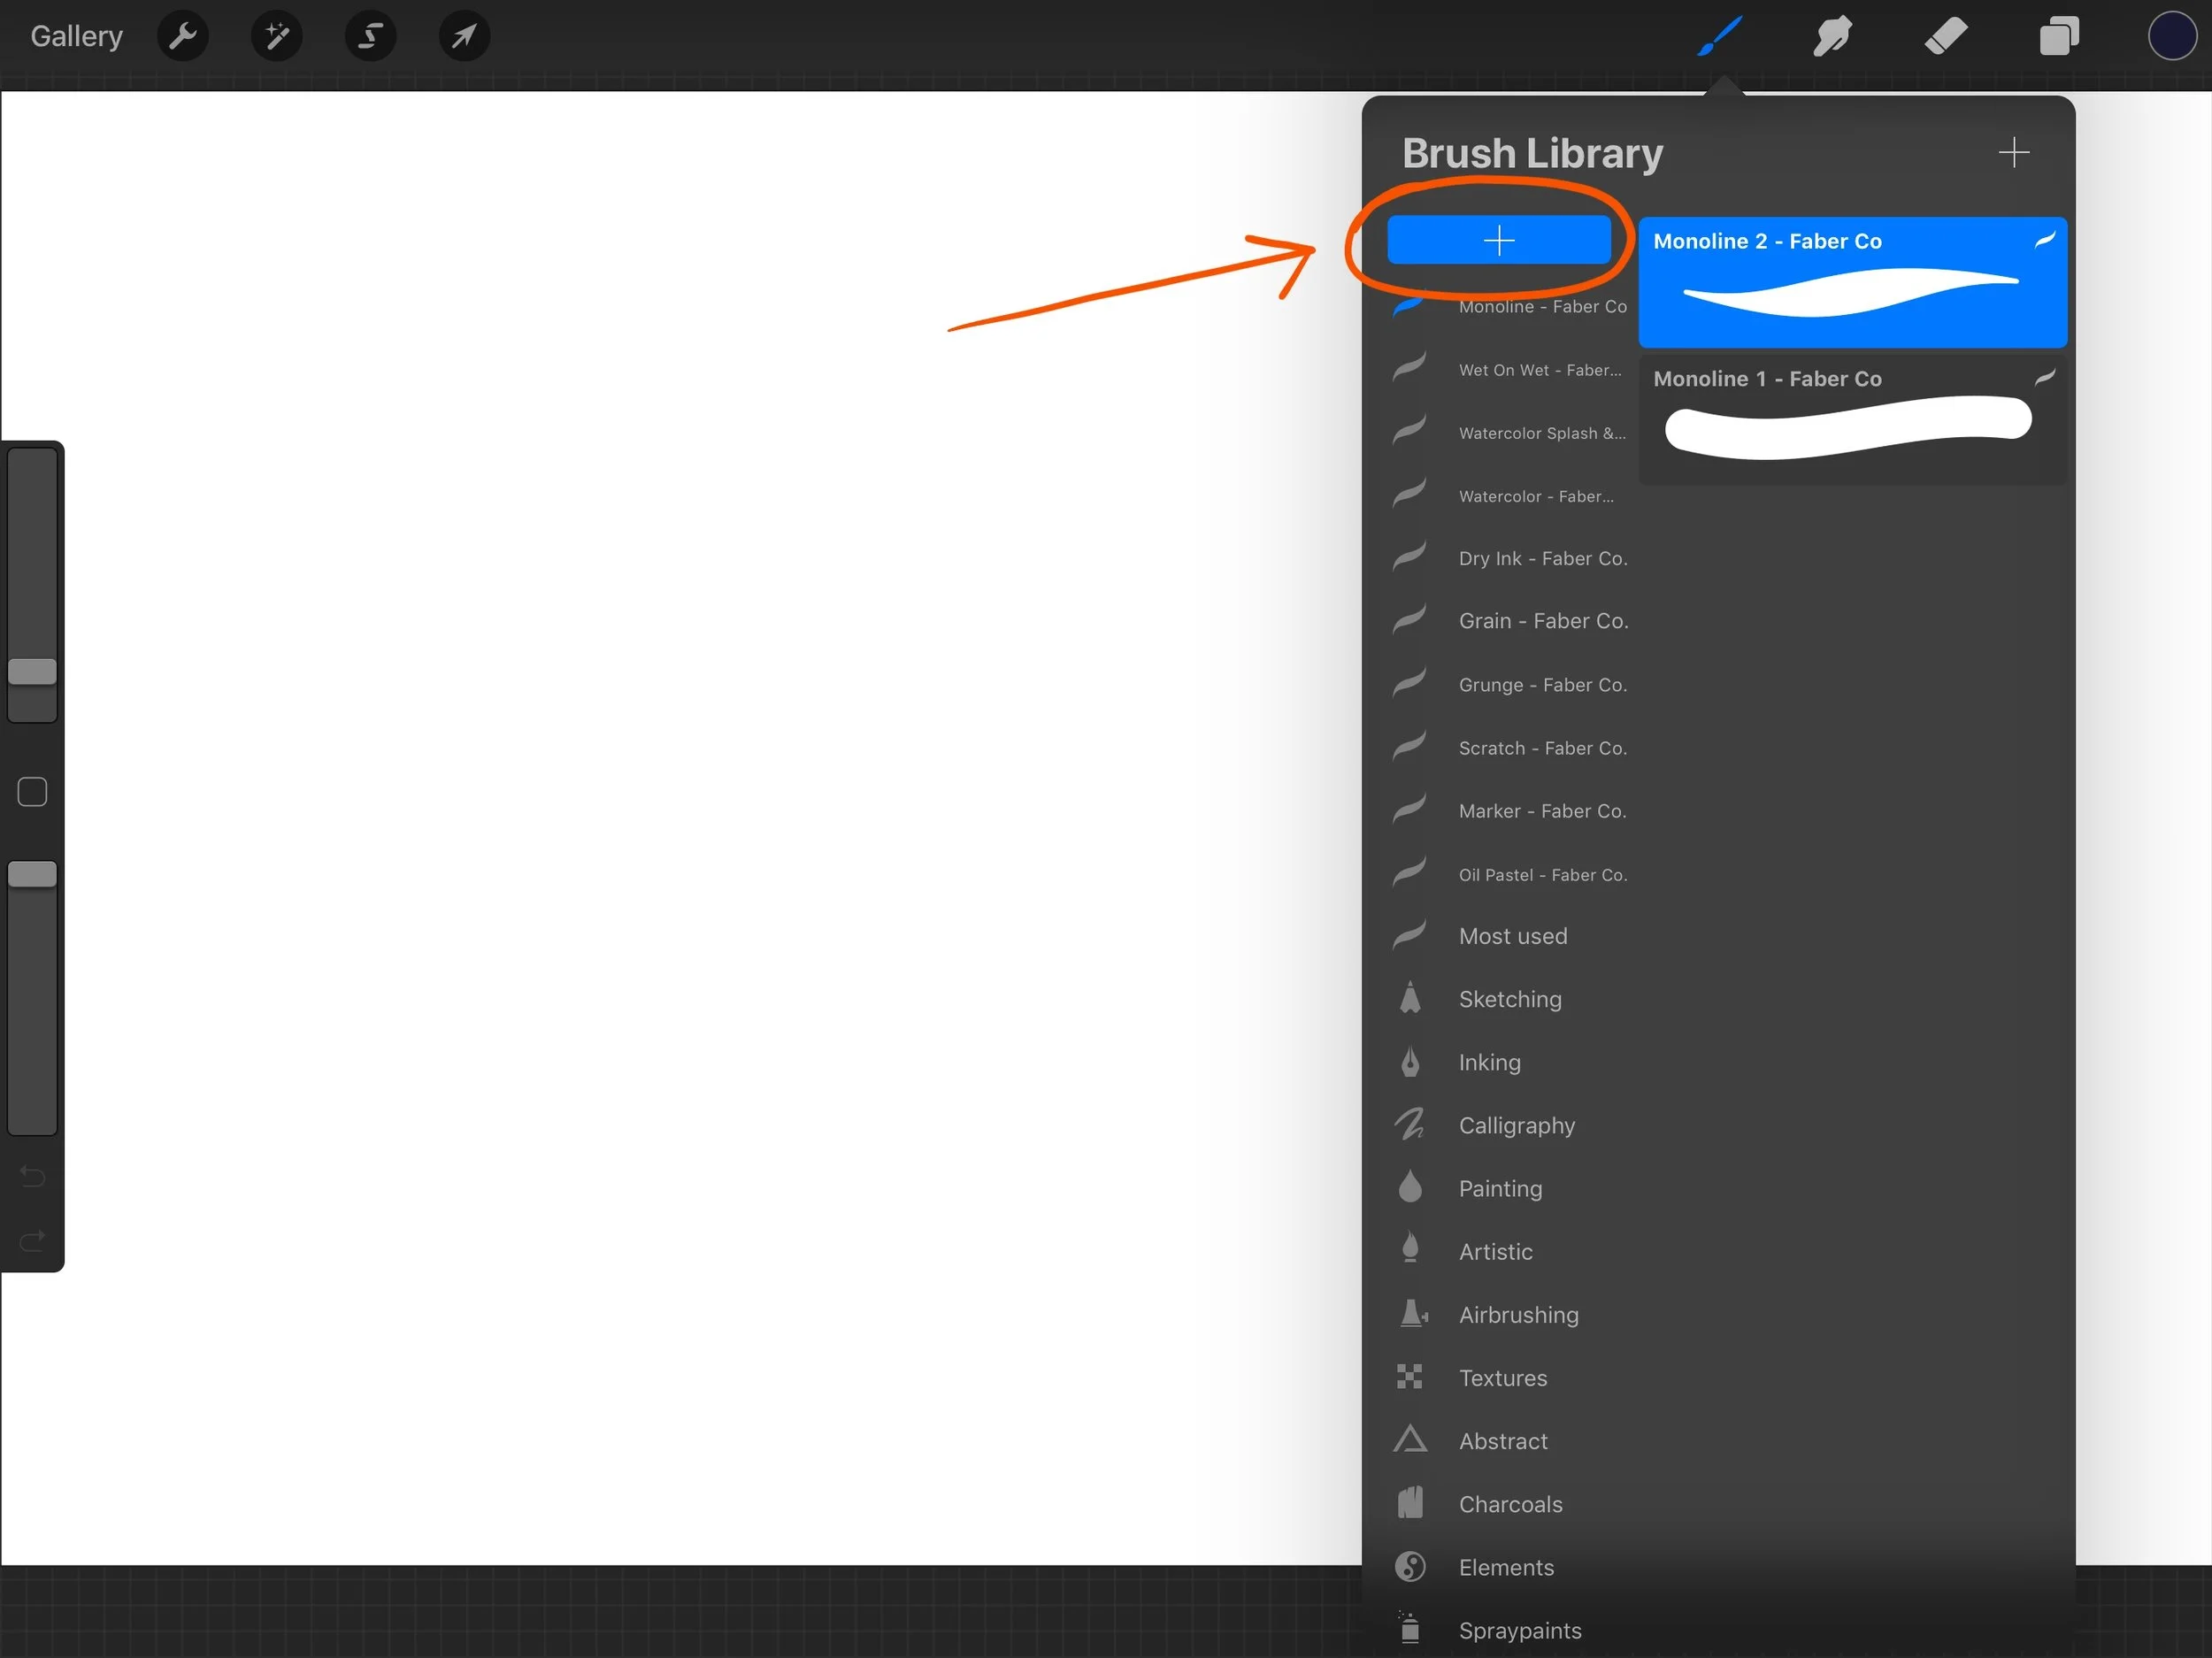
Step 1
Drag down with your fingers over the brush library - this will show a blue plus button. Click the button and create a new library. You could import your brushes in any folder in the brush library, but we suggest that you make a new folder, that way it’s easier to keep your brush library organised.
Step 2
Name your new brush library - in this example we name ours to New Brushes.

Step 3
Click on the little plus at the top right corner of your brush library to add a brush.

Step 4
Click on Import at the top right corner to import a brush.

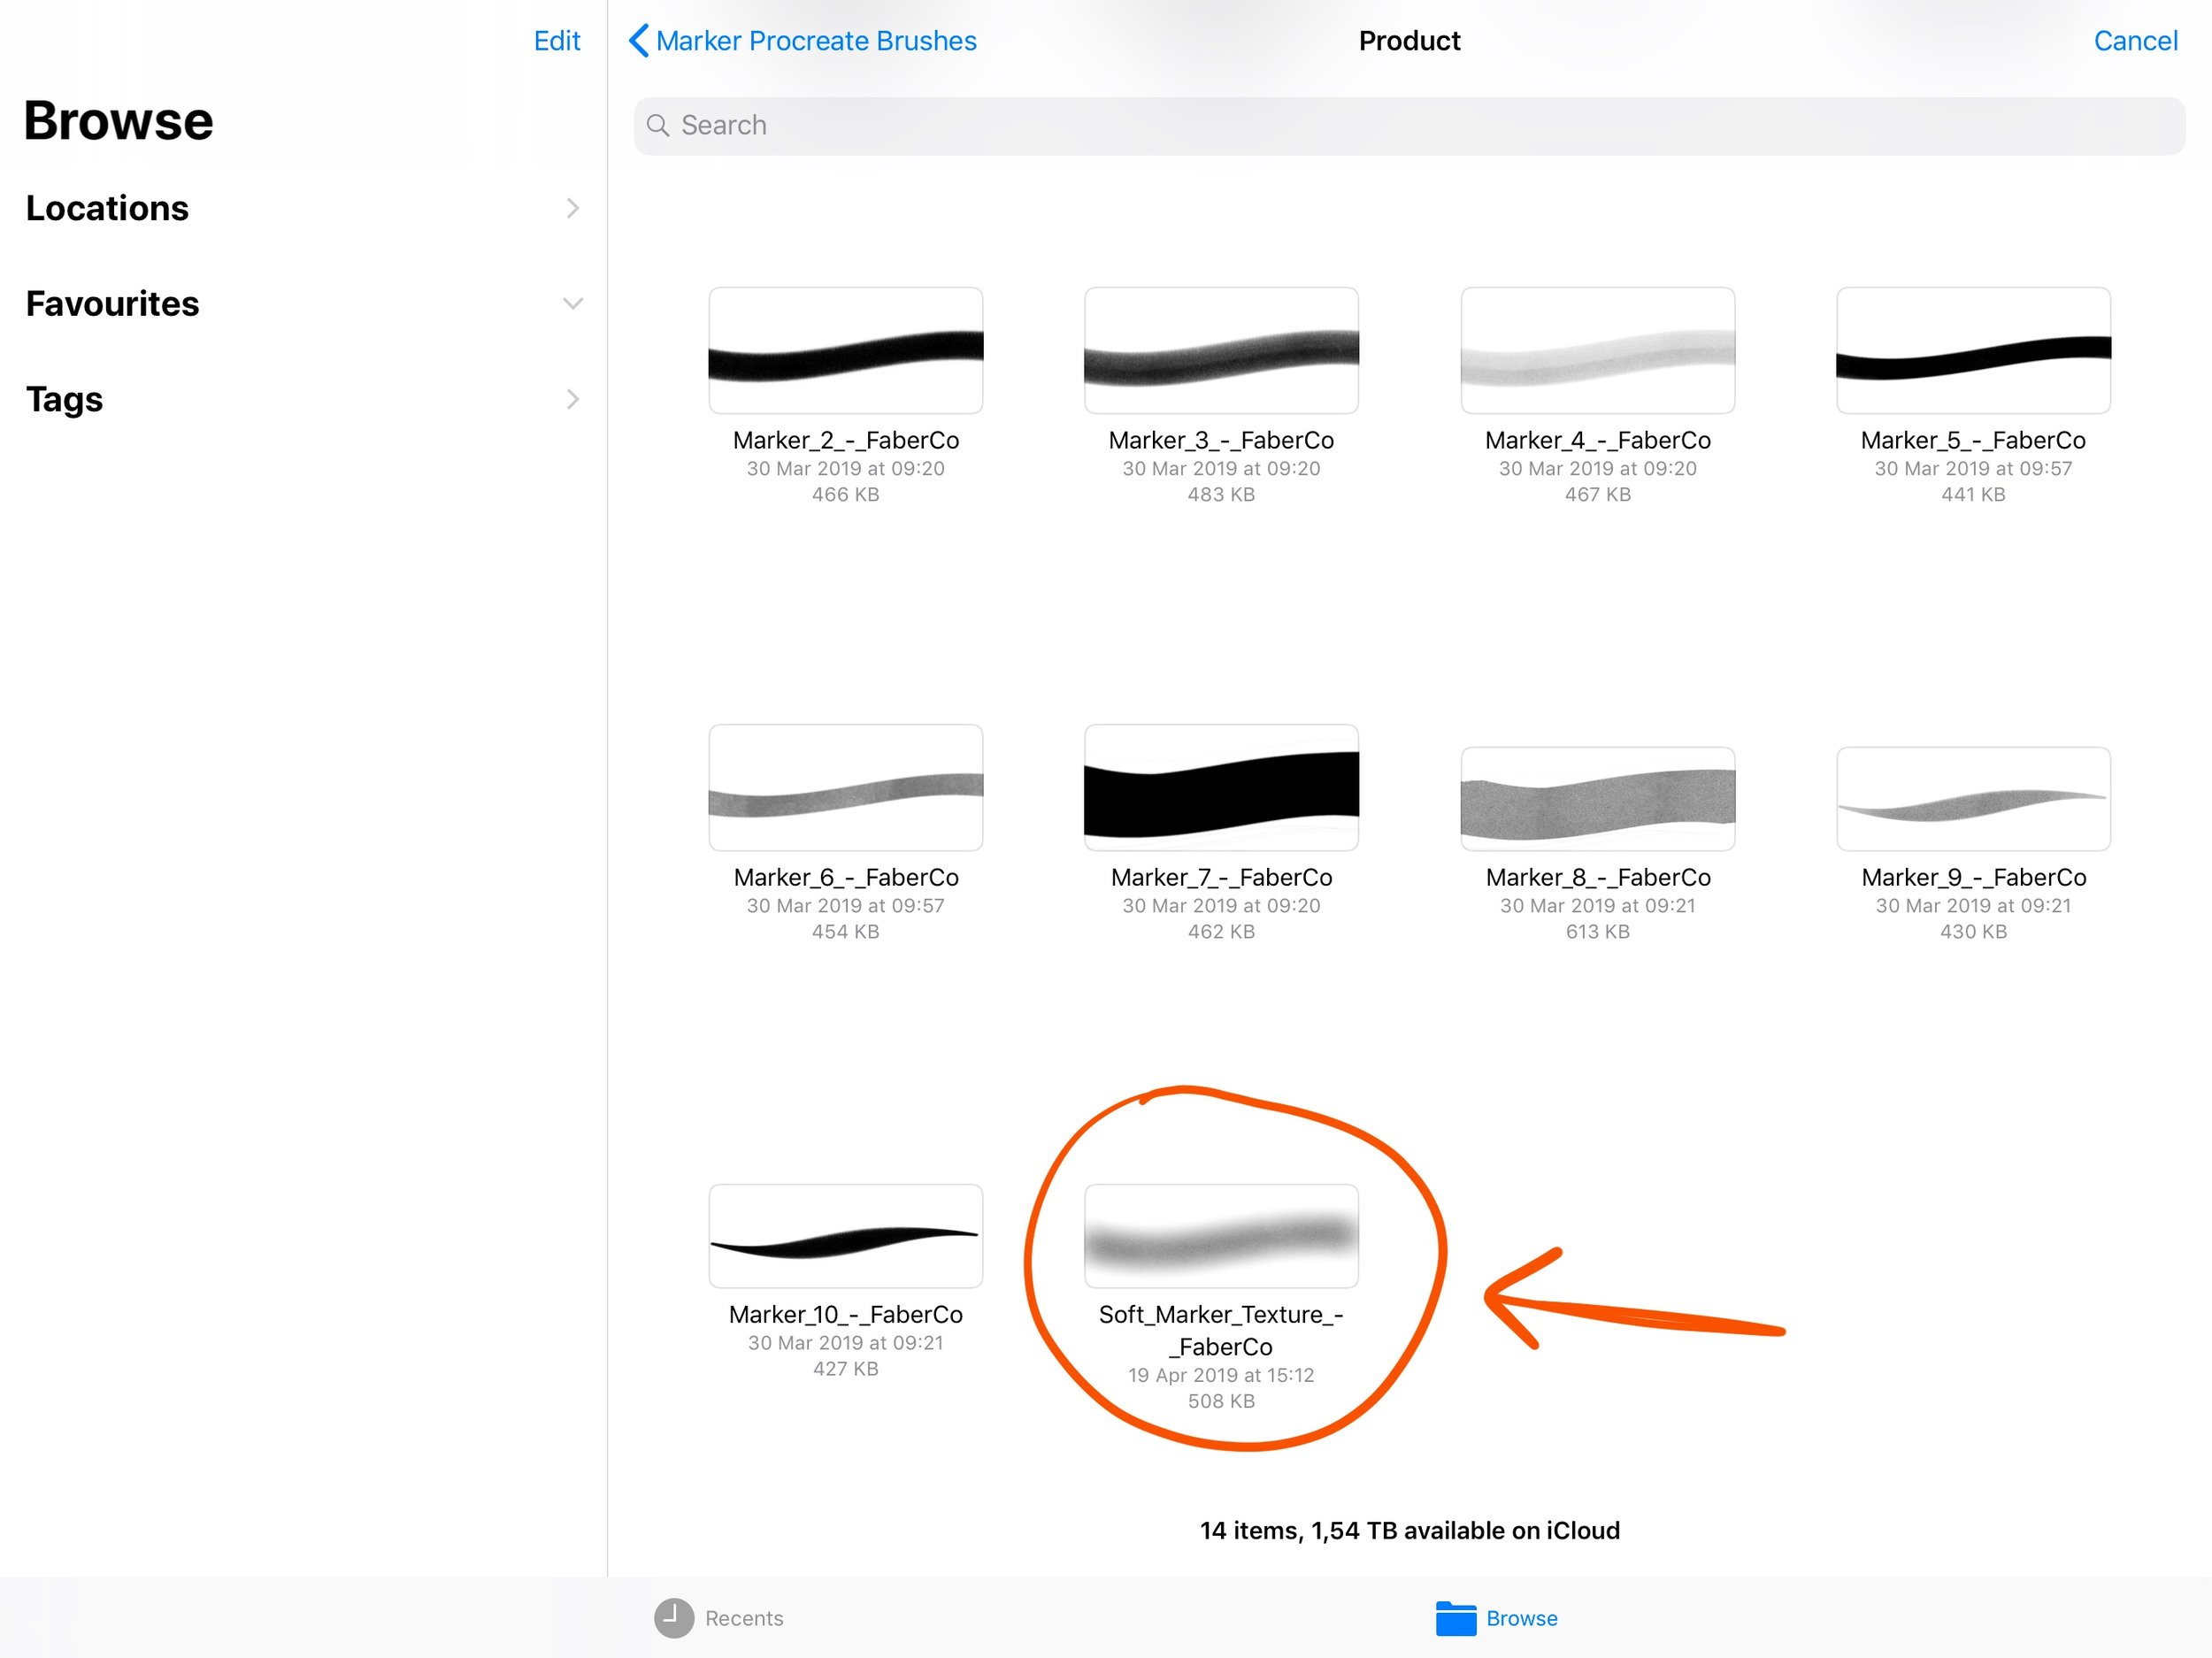
Step 5
Choose the location of your brush and click on the brush file you want to add - in this example we pick a brush stored at our iCloud Drive.
Step 6
Your brush is installed in your new brush folder and ready to be used.
